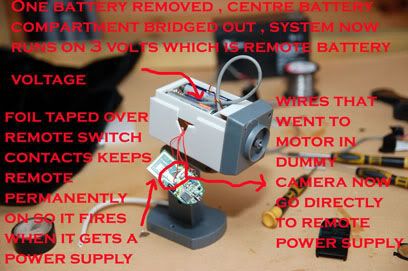
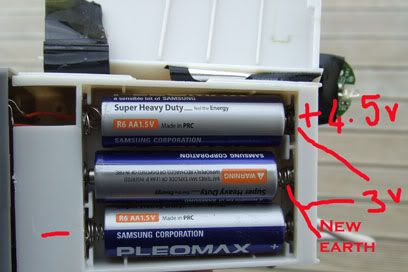
First I started with a cheap [ $9 ] dummy security camera that moves from side to side when it detects motion to give people the impression that they are on video . It runs on 3 X AA 1.5 volt batteries which makes it 4.5 volts . { The motion sensor is pathetic so I am getting something better next week , but the same principle applies }
Since the camera remote of my Nikon runs on a 3 volt battery I removed one battery and bridged out that connection in the battery holder making it effectively also a 3 volt system and it still works on that voltage - not that I'm promising that every one you buy will be able to do that :) !
Now this is obviously very rough as it involved a fair amount of trial and error and modifications , so you could do a better job now that you know how it goes - and I will do a better job when my more advanced motion sensor arrives , and I'll share the results with you as well :) .
The basic concept is this : The dummy camera is always 'on' and when it detects motion it switches its power supply to the little motor inside which moves from side to side for about 25 seconds .
By removing one battery and bridging out the contacts of that section of the compartment you are making it a 3 volt system - I'll explain the other option further down .
You open the dummy camera , and cut the wires to the motor and take them to the battery feed of your camera remote !
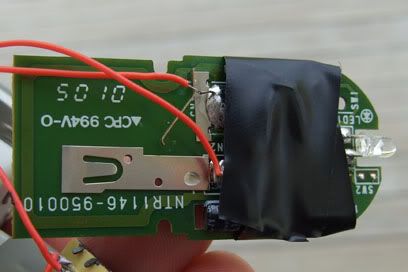
In the meantime , if you want a neat job , you tape something around the remote , holding the button down [ I ended up taping some copper wire over the bare contacts after destroying the outer case of the remote :D ] ,and this means " you are always pushing the button " of the remote , and when the dummy camera supplies the power to it , it triggers the camera for about 25 seconds meaning you could have the camera in multi-shot mode or use the auto-focus option knowing it will have 25 seconds to get the auto focus right and take the shot[s] .
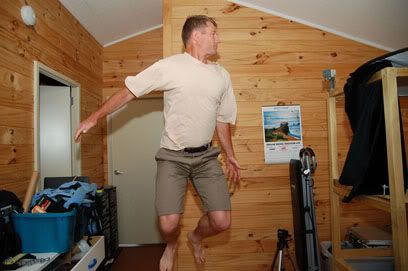
Imagine a hawk on the side of the road eating some road-kill . You move the 'food' to a safer location , set up the camera and motion sensor and move away - and wait for the hawk to come back and trigger the camera a few times for some cool photos .
If you are concerned that a motion sensor you are using may not work on 3 volts you could always do what auto electricians would tell you not to .... pick up an earth feed from between the batteries . The dummy camera I opened had a bunch of earth wires at one point and one of them went to the motor , along with the positive feed going to the motor . You could still use the positive feed and ignore the earth feed and instead take an 'earth' feed from behind the first battery in line , thereby using only two of the batteries for your supply to the remote .
This is not exactly healthy for the batteries because the two batteries you are using will go flat before the one you are not using for your feed but this will take a very long time and batteries are cheap enough for the results you will get . You could also measure the batteries occasionally and 'rotate them ' , swapping them around regularly .
 I'll provide an update when my new door sensor arrives and hopefully will have something that works a little better in direct sunlight and has a better range .
Now , how do you get to the battery contacts without destroying the outer cover ?!
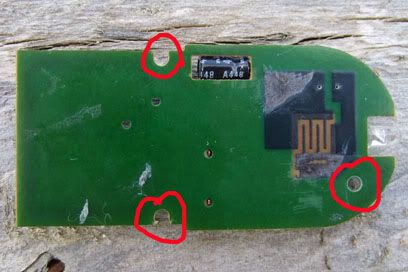
Here's a picture showing where the screws are located under the cover so you don't have to peel it off . There are three screws , this is looking from the top .....
 Now you can just cut away a small section of the cover to get to the screws and open the remote and solder two wires to the battery supply - of course you don't re-fit your battery after doing this !
Hopefully I will have an update on a superior model next week !
.


No comments:
Post a Comment